Set Up Imgwire
Start here before adding Imgwire to an application. This guide covers the dashboard setup you need before choosing a frontend or backend quickstart.
Create your account and organization
Go to dashboard.imgwire.dev and create an Imgwire account. During onboarding, create a new organization, accept the Terms of Service and Privacy Policy, and select a plan for the organization.
Your organization is the top-level workspace for the Imgwire applications and environments you manage. Complete this step first so the dashboard can create resources for the correct organization.
Create an Environment
After your organization is ready, create an Environment for the application you want to integrate. Use the Environment dropdown in the dashboard header navigation, then choose New Environment.
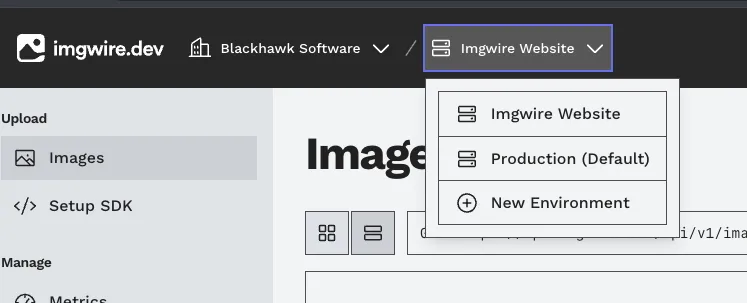
Create a new Environment from the dashboard header dropdown.
Use an Environment name that maps clearly to the application or deployment context you are setting up. If you work on multiple applications, create separate Environments so each application is easier to manage from the dashboard.
Choose your quickstart
Once your Environment exists, choose the quickstart that matches where your Imgwire integration starts:
- Frontend Quickstart for browser-based uploads, image rendering, and client-side application work.
- Backend Quickstart for server-side uploads, protected credentials, and backend image workflows.
Last updated at: May 9, 2026